

Hello friends. In this guide, we’re going to see how to backup & restore your downloaded games to a NAS (Network Attached Storage).
This is useful in keeping an offline backup of your games without the need to re-download them over the internet if you want to play them again – this is particularly helpful if your internet connection is slow and re-downloading a game takes hours or even days. Also offloading the backed-up games to a NAS frees up space on your computer’s drives.
So, without further ado:
Map your NAS to a “local” mapped drive:
- Make sure your NAS is up and running and accessible over the network from your PC
- Create a mapped drive of the location on the NAS you’d like to store your games – for example, on my NAS I have a folder named “Steam_Backups” and I use that location to backup/restore games.
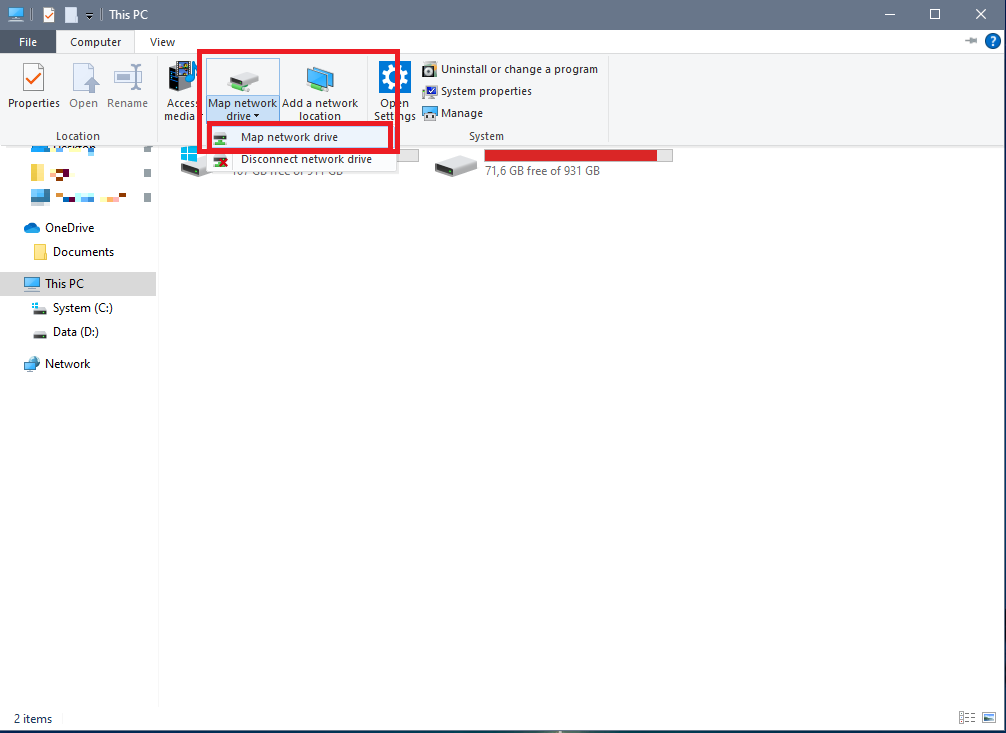
To map a network drive, you need to open “My Computer”, click “Computer” near the top, and then click “Map Network Drive”
On the new window that comes up, select your desirably Drive letter (I chose Z), and in the “Folder” field you need to put the IP address and the destination folder of your NAS – In my case, I’ve entered \\192.168.1.30\Steam_Backups.
Make sure you have “Reconnect at sign-in” enabled, as that will help keep the map drive active after you sign out or restart the PC.
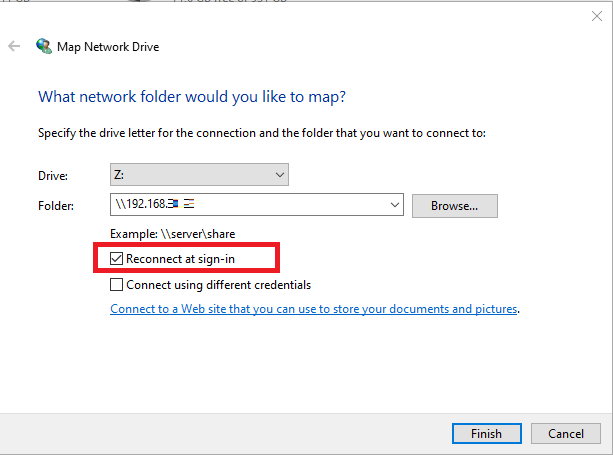
You should now be done creating the Map drive by clicking “Finish” – Please note, it might ask you for credentials if they’re not already saved on your “Credential Manager” for that network location.
Backup Steam games to your new mapped drive:
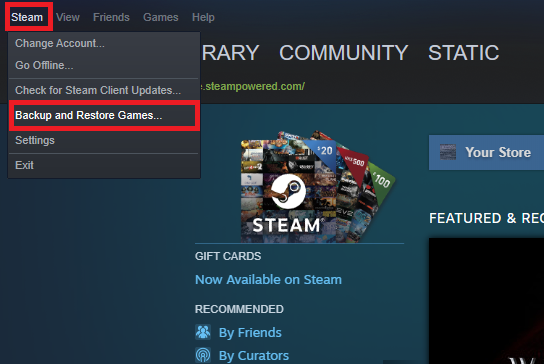
3. Now go to the Steam client, click “Steam” on the top left corner of the window, and select “Backup and Restore Games…”
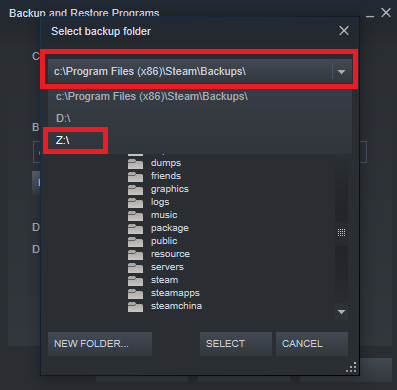
- On the new window, select “Backup currently installed programs” and after clicking “Next” you’ll be presented with a list of all the installed games – select all those you need to backup (even more than one) and on the next step, clicking “Browse” will present you with the available drives to store the backup to.
- Select the map drive letter you have chosen on step2.
- After you have selected that, clicking “Next” will ask you for the “Backup File name” and the file size – useful if you want to burn the backup to CDs or DVDs but does not make much difference for our NAS – I tend to choose DVD as to create a smaller number of files in the destination. Clicking “Next” will start your backup.
As you will see, it will take some time to backup, depending on your LAN speed and the game size. After the backup is done, you can move forward on deleting the installed game from your PC to claim back some disk space!
Restore games from your NAS:
Now in case you need to restore a game from your NAS, open the Steam client and on the top left click “Steam”, then “Backup and Restore Games…”, and now choose “Restore a previous backup”. After that, you will get to choose the source folder by clicking “Browse” and again selecting your mapped drive from the list.
After selecting the mapped drive, you will be presented with all the backed-up games you have stored there – simply select the one you’d like to restore and proceed with restoring it.
This will move the game files from your NAS back to your PC, making the game playable again without re-downloading from scratch – only any updates since the backup will be downloaded. If there are any big updates, I usually back up again after the game is updated installed so I can have a fresh version of the game in question on my NAS.
Hopefully, the above guide will help you avoid redownloading games if you need to quickly make some space or format your PC!
This post was first published on overage-gaming by static. If you like what you see here and want to see more, you can check me out on Twitter and YouTube as well.